ERROR: Uesd ink tank is full
Waste Error Reset
1: Remove the Cartridge
2: Unplug the AC Power Cord
3: Open Front access panel
3: Hold down the RESUME/RESET button and plug in the AC power cord
4: Release RESUME/RESET after plugging in the AC Power cord.
5: Press the RESUME/RESET once within 5 seconds and release the RESUME/RESET .
6: Press and HOLD RESUME/RESET for two seconds or more and release it.
7: Press and HOLD RESUME/RESET for two seconds or more and release it.
8: Unplug AC Power Cord to set data
If it does not work. Try some more times. Thanks every one above.
Showing posts with label canon. Show all posts
Showing posts with label canon. Show all posts
Wednesday, June 12, 2013
Monday, June 10, 2013
Canon iP1500 Resetter
Waste Ink Counter Reset. Manual for Service mode
1. Turn off the printer. And disconnect the printer cable.
2. Press and hold the POWER button, turn on the printer.
3. The indicator (L.E.D.) should be green.
4. Press and release the RESUME button , the indicator (L.E.D.) should be orange.
5. Press and release the RESUME button again, the indicator (L.E.D.) should be green
6. Release both buttons
resetter Canon IP1500 : Download
Driver Canon PIXMA IP1500 Download
Manual Reset_iP1500.pdf
1. Turn off the printer. And disconnect the printer cable.
2. Press and hold the POWER button, turn on the printer.
3. The indicator (L.E.D.) should be green.
4. Press and release the RESUME button , the indicator (L.E.D.) should be orange.
5. Press and release the RESUME button again, the indicator (L.E.D.) should be green
6. Release both buttons
resetter Canon IP1500 : Download
Driver Canon PIXMA IP1500 Download
Manual Reset_iP1500.pdf

Friday, June 7, 2013
ERROR CODE AND RESET CANON MP150 MP160

E9 The connected digital camera / video camera does not support Camera
Direct Printing
E14 The Ink cartridges whose destination are wrong
E15 Ink cartridge is not installed E16 - Ink remaining is unknown
E16 -E19 Failed to scan head alignment sheet
E22 Carriage error
E23 Paper feed error
E24 Purge unit error
E25 ASF(cam) sensor error
E26 Internal temperature rise error
E27 Waste ink absorber full or platen waste ink absorber full
E28 Ink cartridge temperature rise error -
E29 EEPROM error
E33 Paper feed position error
E35 15 USB Host VBUD overcurrent error - USB
E37 17 Abnormal motor driver error
E40 20 Other hardware error
E42 22 Scanner error
Wednesday, June 5, 2013
reset waste ink canon iP4000
Here this step by step to resetting waste ink counter printer canon iP4000
1. With the printer plugged in and powered off, press and hold the
Resume/Cancel button, then press and hold the Power button.
Do not release the buttons. The LED light should be green to
indicate that a function is selectable
2. While holding the Power button, release the Resume/Cancel button,
do not release the Power button
3. While holding the Power button, press the Resume/Cancel button 2 times,
and then release both the Power and Resume/Cancel buttons. Each time the
Resume/Cancel button is pressed, the LED lights alternately in orange and
green, starting with orange.
4. When the LED light is green, press the Resume/Cancel button 4 times. Each
time the Resume/Cancel button is pressed, the LED lights alternately in
orange and green, starting with orange.
5. Press the Power button. The LED lights in green, and the reset is performed.
When the operation completes, the printer returns to the menu selection
mode automatically
6. Press the power button to exit service mode.
1. With the printer plugged in and powered off, press and hold the
Resume/Cancel button, then press and hold the Power button.
Do not release the buttons. The LED light should be green to
indicate that a function is selectable
2. While holding the Power button, release the Resume/Cancel button,
do not release the Power button
3. While holding the Power button, press the Resume/Cancel button 2 times,
and then release both the Power and Resume/Cancel buttons. Each time the
Resume/Cancel button is pressed, the LED lights alternately in orange and
green, starting with orange.
4. When the LED light is green, press the Resume/Cancel button 4 times. Each
time the Resume/Cancel button is pressed, the LED lights alternately in
orange and green, starting with orange.
5. Press the Power button. The LED lights in green, and the reset is performed.
When the operation completes, the printer returns to the menu selection
mode automatically
6. Press the power button to exit service mode.
Sunday, June 2, 2013
Restore Canon iP6210D iP6220D MP150 MP170 MP450 iP2200 iP1600
You can try this software to help you :
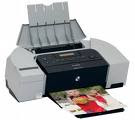
Download program
After download dont forget your comment in guest book. thanks

Download program
After download dont forget your comment in guest book. thanks
Sunday, May 26, 2013
RESET WASTE INK TANK CANON
For seri i250, i255, i350, i355, PIXUS 350i
indicates :
WASTE INK TANK Full, printer has no respon
The Solutions :
1. Download i320 Service Tool or 350,355,250,255 Service Tool
2. Do service mode procedure to printer, the methods are ::
- Turn off printer, Take off USB cabel dan power cabel
- Push and hold POWER button, take on power, Turn on printer
- Indikator LED will be in green colour
- Push and let RESUME button, indicator LED will be in yellow colour
- Push and let RESUME button once more, indicator LED will be in green colour
- Let POWER button
This time printer in MODE SERVICE
Reset Manual i255-i355.pdf
ManualReset_i320.pdf
3. Do reset waste ink tank procedure with :
4. take on USB cabel
5. Do program General Tool
6. The Figure will be like this :
7. Choose the parameter no 1
8. Put on no 2 according to printer canon, DON”T BE WRONG!!!
9.Congratulation… printer has been in Reset.
indicates :
WASTE INK TANK Full, printer has no respon
The Solutions :
1. Download i320 Service Tool or 350,355,250,255 Service Tool
2. Do service mode procedure to printer, the methods are ::
- Turn off printer, Take off USB cabel dan power cabel
- Push and hold POWER button, take on power, Turn on printer
- Indikator LED will be in green colour
- Push and let RESUME button, indicator LED will be in yellow colour
- Push and let RESUME button once more, indicator LED will be in green colour
- Let POWER button
This time printer in MODE SERVICE
Reset Manual i255-i355.pdf
ManualReset_i320.pdf
3. Do reset waste ink tank procedure with :
4. take on USB cabel
5. Do program General Tool
6. The Figure will be like this :
7. Choose the parameter no 1
8. Put on no 2 according to printer canon, DON”T BE WRONG!!!
9.Congratulation… printer has been in Reset.
Thursday, May 23, 2013
Canon Pixma MP210 Multifunctional Inkjet Printer
The goodThe good: Excellent task quality; decent task speeds, particularly photo printing; PictBridge port.
The badThe bad: No memory card slots; task feature sets arent as fleshed out as the competitions.
The bottom lineThe bottom line: If youre looking for the best print and scan quality from a budget all-in-one, the Canon Pixma MP210 is the one for you. Other models, however, offer more substantial feature sets.
Specifications: Office Machine Functions: Copier , Printer , Scanner ; Printer type: Multifunction printer ; Printing Technology: Ink-jet ; See full specs
The badThe bad: No memory card slots; task feature sets arent as fleshed out as the competitions.
The bottom lineThe bottom line: If youre looking for the best print and scan quality from a budget all-in-one, the Canon Pixma MP210 is the one for you. Other models, however, offer more substantial feature sets.
Specifications: Office Machine Functions: Copier , Printer , Scanner ; Printer type: Multifunction printer ; Printing Technology: Ink-jet ; See full specs
canon iR Firmware Versions
iR1600/2000 - Main 38.02 NIC 3.00 Finisher L1
iR2200/2800/3300 - Boot ROM 13.33C System 40.06 Message 40.06 RUI 40.04
HD Format10 G3 Fax 18.08
iR2200N/2800N/3300N - Boot ROM 13.33N System 40.06
iR2200i/3300I - Boot ROM 13.33N System 20.08N Message 20.08 RUI 20.05
HD Format 4 G3 Fax 18.08
iR5000/6000 - Boot ROM 13.53 System 17.01 RUI 15.05 HD Format 6
iR5000N/6000N - System 17.01N
iR5000/6000 (with BW2) - Boot ROM 9.28C 512 System 72.01 6326 RUI 71.01 434 HD Format 8
iR5000N/6000N (with BW2) - Boot ROM 9.28N System 72.01N
iR5000i/6000i - Boot ROM 9.28N System 8.02N Message 8.02 RUI 8.01 HD Format 7
iR7200 - Boot ROM 13.33C System 71.01 Message 71.01 RUI 70.20 HD Format 5
iR7200N - Boot ROM 13.33N System 71.01N
iR8500 - Boot ROM 13.33C System 71.01 Message 71.01 RUI 70.20 HD Format 10
iR8500N - Boot ROM 13.33N System 71.01N
iR105 - Boot ROM 13.33C System 71.01 Message 71.01 RUI 70.20 HD Format 5
iR105N - Boot ROM 13.33N System 71.01N
iR C3200 - Boot ROM 2.05 System 7.01 Message 7.01 RUI 4.02 HD Format 14 G3 Fax 51.02
Dcon 8.02 Rcon 3.01
iR C3200N - Boot ROM 2.05N
iR2200/2800/3300 - Boot ROM 13.33C System 40.06 Message 40.06 RUI 40.04
HD Format10 G3 Fax 18.08
iR2200N/2800N/3300N - Boot ROM 13.33N System 40.06
iR2200i/3300I - Boot ROM 13.33N System 20.08N Message 20.08 RUI 20.05
HD Format 4 G3 Fax 18.08
iR5000/6000 - Boot ROM 13.53 System 17.01 RUI 15.05 HD Format 6
iR5000N/6000N - System 17.01N
iR5000/6000 (with BW2) - Boot ROM 9.28C 512 System 72.01 6326 RUI 71.01 434 HD Format 8
iR5000N/6000N (with BW2) - Boot ROM 9.28N System 72.01N
iR5000i/6000i - Boot ROM 9.28N System 8.02N Message 8.02 RUI 8.01 HD Format 7
iR7200 - Boot ROM 13.33C System 71.01 Message 71.01 RUI 70.20 HD Format 5
iR7200N - Boot ROM 13.33N System 71.01N
iR8500 - Boot ROM 13.33C System 71.01 Message 71.01 RUI 70.20 HD Format 10
iR8500N - Boot ROM 13.33N System 71.01N
iR105 - Boot ROM 13.33C System 71.01 Message 71.01 RUI 70.20 HD Format 5
iR105N - Boot ROM 13.33N System 71.01N
iR C3200 - Boot ROM 2.05 System 7.01 Message 7.01 RUI 4.02 HD Format 14 G3 Fax 51.02
Dcon 8.02 Rcon 3.01
iR C3200N - Boot ROM 2.05N
Canon iR 1022A

Description
Canon iR1022A: Summary
The compact iR1022A brings document feeding and 22 page per minute production to your desktop. Add double siding documents and energy saving features and youve found a winning formula for your office.
Canon iR1022A: Some Performance Features
Print / copy at 22 pages per minute - Double-sided documents - Document feeder - Superb 1200 dpi print resolution - Compact, desktop operation - great for small businesses - Easy network set-up - Energy save & instant recovery - Environmentally considerate
The iR1022A offers you brilliant communication for home offices and small businesses. The iR1022A helps you to be more productive with less effort. Copy beefy reports with the document feeder or print double sided presentations, all at a swift 22 pages per minute. Add an energy saving mode with instant recovery and you have the ideal solution for home offices or small business needing quick and cost-effective results.
Great for large documents. When you have large documents to copy, its great to have the flexibility to do it at your desk and in no time. Thanks to the built in document feeder, and electronic sorting, you can leave it to the iR1022A to get the job done with no fuss.
Effortless network integration is yours with the iR1022A. Youre not the only one who can benefit from the productivity enhancing benefits of the iR1022A. The iR1022A can be easily connected to your network so colleagues can take advantage too. Network printing is enabled using Canons advanced-performance proprietary printer language UFR II Lite, and a PCL printing option is also provided.
The iR1022A is space saving and scalable. Designed specifically to help enhance the productivity of small businesses and office workgroups, the iR1022A is a compact performer with big ideas. Configured with a generous 600 on-line sheets, you can enhance capacity further to a sizeable 1,100 A4 sheets if required.
Canon iR1022A: Design Features
Environmentally considerate production methods ensure that the Canon iR1022A complies with the European RoHS and WEEE* directives, prohibiting lead and hazardous substances from the manufacturing process. In addition the machine conforms to the International Energy Star Program.
*Restriction of Hazardous Substances (RoHS) and the EU Directive on Waste from Electrical and Electronic Equipment (WEEE)
Also Known As
Wednesday, May 22, 2013
Canon printer i850 i950 S600
Dear all reseters
Start with the printer OFF
1. Hold down RESUME and then hold down POWER
2. release RESUME
3. press RESUME twice, then release POWER
4. Let green light blink until printer is done futzing Select function with RESUME press POWER to execute: presses - light color - function
Number of presses - light color - function
0 presses - green - Test print (or exit service mode on i960)
1 press - orange - EEPROM info print (plus grid nozzle diagnostic on i960)
2 presses - green - EEPROM initialize
3 presses - orange - Reset waste ink counter
Start with the printer OFF
1. Hold down RESUME and then hold down POWER
2. release RESUME
3. press RESUME twice, then release POWER
4. Let green light blink until printer is done futzing Select function with RESUME press POWER to execute: presses - light color - function
Number of presses - light color - function
0 presses - green - Test print (or exit service mode on i960)
1 press - orange - EEPROM info print (plus grid nozzle diagnostic on i960)
2 presses - green - EEPROM initialize
3 presses - orange - Reset waste ink counter
Canon i850 i950 S600
Start with the printer OFF
1. Hold down RESUME and then hold down POWER
2. release RESUME
3. press RESUME twice, then release POWER
4. Let green light blink until printer is done futzing
Select function with RESUME press POWER to execute:
presses - light color - function
Number of presses - light color - function
0 presses - green - Test print (or exit service mode on i960)
1 press - orange - EEPROM info print (plus grid nozzle diagnostic on i960)
2 presses - green - EEPROM initialize
3 presses - orange - Reset waste ink counter
1. Hold down RESUME and then hold down POWER
2. release RESUME
3. press RESUME twice, then release POWER
4. Let green light blink until printer is done futzing
Select function with RESUME press POWER to execute:
presses - light color - function
Number of presses - light color - function
0 presses - green - Test print (or exit service mode on i960)
1 press - orange - EEPROM info print (plus grid nozzle diagnostic on i960)
2 presses - green - EEPROM initialize
3 presses - orange - Reset waste ink counter
Canon Error Code E101 Canon Eror code E150 E151 E152 E153 E154 E155
E150 Neither thermistor nor trimmer resistance is connected to the head.
(The head is not connected.)
E151 The thermistor of the head is open-circuited.
E152 The thermistor of the head is short-circuited.
E153 The trimmer resistance of the head is open-circuited.
E154 The trimmer resistance of the head is short-circuited.
E155 The trimmer resistance of the head is out of specifications.
E156 When a specific voltage is applied to the head, the voltage of the
head is not changed within a specific time.
E157 The voltage of the head is out of the specifications.
E160 The temperature of the head does not reach a specific temperature
within a specific time.
E161 The temperature of the head exceeds a specific temperature.
E170 When the pulse motor for the head scan is driven, it cannot be
detected by a sensor within a specific time.
E171 The motor is not connected to the pulse motor driver PCB for the head scan.
E172 The gate array employed to drive the pulse motor for head scan is faulty.
E180 The motor is not connected to the vertical scanning pulse motor driver PCB.
E181 The gate array employed to drive the vertical scanning pulse motor is faulty.
E182 After the vertical scanning motor is driven, the phase sensor cannot be
detected within a specific time.
E183 After the registration roller cam clutch 2 is turned ON, a given
paper size cannot be detected within a specific time.
E190 RAM directly connected to CPU is faulty.
E191 An error occurs in the communication with the microcomputer (D/A
converter) for high voltage use.
(The head is not connected.)
E151 The thermistor of the head is open-circuited.
E152 The thermistor of the head is short-circuited.
E153 The trimmer resistance of the head is open-circuited.
E154 The trimmer resistance of the head is short-circuited.
E155 The trimmer resistance of the head is out of specifications.
E156 When a specific voltage is applied to the head, the voltage of the
head is not changed within a specific time.
E157 The voltage of the head is out of the specifications.
E160 The temperature of the head does not reach a specific temperature
within a specific time.
E161 The temperature of the head exceeds a specific temperature.
E170 When the pulse motor for the head scan is driven, it cannot be
detected by a sensor within a specific time.
E171 The motor is not connected to the pulse motor driver PCB for the head scan.
E172 The gate array employed to drive the pulse motor for head scan is faulty.
E180 The motor is not connected to the vertical scanning pulse motor driver PCB.
E181 The gate array employed to drive the vertical scanning pulse motor is faulty.
E182 After the vertical scanning motor is driven, the phase sensor cannot be
detected within a specific time.
E183 After the registration roller cam clutch 2 is turned ON, a given
paper size cannot be detected within a specific time.
E190 RAM directly connected to CPU is faulty.
E191 An error occurs in the communication with the microcomputer (D/A
converter) for high voltage use.
Tuesday, May 21, 2013
Canon MP110

step by step
Reset Printer Canon MP110
1. Enter SERVICE MODE By pressing Menu-Scan-Copy-Scan
2. Enter NVRAM by pressing <--- or ---> then OK
3. Enter CMY ink level by pressing <--- or ---> then OK
4. Select 1 by pressing <--- or ---> then OK
5. Enter K ink level by pressing ---> then OK
6. Select 1 by pressing <--- or ---> then OK
7. Press reset ( design: // )
Canon PIXMA MP750 Error 6A00
Error 6A00 on my Canon MP750.
The alarm light was flashing and the LCD message said to "CHECK PRINTER (PRESS [OK])"
Heres what I did (after doing a hundred other things that didnt work):
1. I opened the printer as if I was changing an ink cartridge.
2. The ink cartridge carriage did not move to the center as it should (one of the symptoms).
3. I moved the ink cartridge by hand to the far left to expose the ink purge area at the far right (under the area where the ink cartridge carriage typically parks itself).
4. I used a small make-up mirror from my wife and a flashlight to look for paper fragments or anything else that might be jammed around in the ink purge area. The mirror was indispensable for viewing areas I couldnt possibly see otherwise.
5. Eureka! I found a some ink-soaked paper fragments crumbled against a roller near the ink purge
6. Now the fun part. While wearing a head flashlight and viewing the small paper jam in the mirror, I used tweezers and needle nose pliers to extract the paper. It was like "Operation," a game I played as a kid, except every movement I made was backwards because of the mirror. It also required some moves that would challenge a circus contortionist.
7. I closed up the printer, hit the okay button, and the printer made some noise like it might work. Unfortunately, the alarm light stayed on. I opened the printer again and noticed that the ink carriage repositioned itself. I took this to be a positive sign as it didnt do this before.
8. I closed up the printer again and hit the okay button again. After several "please wait" messages on the LCD, and positive sounding noises from the printer, the alarm light went out and the printer seemed ready to print.
9. I ran a few test pages through and they printed fine.
The alarm light was flashing and the LCD message said to "CHECK PRINTER (PRESS [OK])"
Heres what I did (after doing a hundred other things that didnt work):
1. I opened the printer as if I was changing an ink cartridge.
2. The ink cartridge carriage did not move to the center as it should (one of the symptoms).
3. I moved the ink cartridge by hand to the far left to expose the ink purge area at the far right (under the area where the ink cartridge carriage typically parks itself).
4. I used a small make-up mirror from my wife and a flashlight to look for paper fragments or anything else that might be jammed around in the ink purge area. The mirror was indispensable for viewing areas I couldnt possibly see otherwise.
5. Eureka! I found a some ink-soaked paper fragments crumbled against a roller near the ink purge
6. Now the fun part. While wearing a head flashlight and viewing the small paper jam in the mirror, I used tweezers and needle nose pliers to extract the paper. It was like "Operation," a game I played as a kid, except every movement I made was backwards because of the mirror. It also required some moves that would challenge a circus contortionist.
7. I closed up the printer, hit the okay button, and the printer made some noise like it might work. Unfortunately, the alarm light stayed on. I opened the printer again and noticed that the ink carriage repositioned itself. I took this to be a positive sign as it didnt do this before.
8. I closed up the printer again and hit the okay button again. After several "please wait" messages on the LCD, and positive sounding noises from the printer, the alarm light went out and the printer seemed ready to print.
9. I ran a few test pages through and they printed fine.
Canon BJ F900 F890 F700 F500 S900 S820 S750 and S520
Turn off the printer.
Press and hold the RESUME button, then press and hold the POWER button.
Release the RESUME button, then press and release the RESUME button two more times in succession. (youre still holding the POWER button during this). The printer mechanics will move momentarily.
You are now in Service mode.
Pressing the RESUME key will select a function; for example, pressing RESUME 4 times will select the clear waste ink counter function. The lamp will alternate color with each key press.
1. service/factory test printout, including ink sensor check
2. EEPROM info printout
3. EEPROM initialization
4. Clear the waste-ink counter
5. Printer model setting. (more selections beyond this- leave this alone)
After selecting mode, press the POWER button to commit the change, and return to the top of the function selection menu. Pressing the POWER button again turns off the printer for a resta
Press and hold the RESUME button, then press and hold the POWER button.
Release the RESUME button, then press and release the RESUME button two more times in succession. (youre still holding the POWER button during this). The printer mechanics will move momentarily.
You are now in Service mode.
Pressing the RESUME key will select a function; for example, pressing RESUME 4 times will select the clear waste ink counter function. The lamp will alternate color with each key press.
1. service/factory test printout, including ink sensor check
2. EEPROM info printout
3. EEPROM initialization
4. Clear the waste-ink counter
5. Printer model setting. (more selections beyond this- leave this alone)
After selecting mode, press the POWER button to commit the change, and return to the top of the function selection menu. Pressing the POWER button again turns off the printer for a resta
Monday, May 20, 2013
canon iR system versions
iR1600/2000
Main 38.02
NIC 3
Finisher L1
iR2200/2800/3300
- Boot ROM 13.33C
- System 40.06
- Message 40.06
- RUI 40.04
- HD Format 10
- G3 Fax 18.08
iR2200N/2800N/3300N
- Boot ROM 13.33N
- System 40.06
iR2200i/3300i
- Boot ROM 13.33N
- System 20.08N
- Message 20.08
- RUI 20.05
- HD Format 4
- G3 Fax 18.08
Main 38.02
NIC 3
Finisher L1
iR2200/2800/3300
- Boot ROM 13.33C
- System 40.06
- Message 40.06
- RUI 40.04
- HD Format 10
- G3 Fax 18.08
iR2200N/2800N/3300N
- Boot ROM 13.33N
- System 40.06
iR2200i/3300i
- Boot ROM 13.33N
- System 20.08N
- Message 20.08
- RUI 20.05
- HD Format 4
- G3 Fax 18.08
Error Code E064 Canon iR3300 Series
Symptom
E064 is indicated on the control panel. The error description is: The presence of a high voltage error is communicated by the composite power supply. The output for primary charging, developing, or transfer has deviated from a specific level of voltage.
Cause
* Adjustments in Service Mode are Incorrect
* Transport Assembly is Not Engaging Properly
* Dirty HVT Contacts for Developing Assembly and Charging Rollers
* A Paper Clip on HVT Contacts or Developing Assembly
* Faulty Transfer Roller
* Faulty Static Charge Eliminator
* Defective Composite Power Supply
* Defective DC Controller PCB Assembly
Action
1. Check the values in Service Mode and make sure they correspond to the Service
Label. If the copier receives a spike or surge through the 240V line these values
can change (can also give you blank copies). Take particular note of the Dev Bias
setting. [COPIER > ADJUST > DEVELOP > DE-DC]
2. Make sure the Transport Assembly is engaging properly. The Transfer Roller should
make good contact with the drum. Check condition of screw (XB6-7501-007) and
Pressure Plates (FB5-4816-000 & FB5-4817-000) for the Transport Assembly.
3. Clean HVT contacts for Primary/ Transfer Charging Rollers and Developing
Assembly. Inspect for any paper clips.
4. Replace the Transfer Roller (FF6-0104-000).
5. Replace the Static Charge Eliminator (FF5-7246-000).
6. Replace Composite Power Supply followed by DC Controller PCB Assembly.
E064 is indicated on the control panel. The error description is: The presence of a high voltage error is communicated by the composite power supply. The output for primary charging, developing, or transfer has deviated from a specific level of voltage.
Cause
* Adjustments in Service Mode are Incorrect
* Transport Assembly is Not Engaging Properly
* Dirty HVT Contacts for Developing Assembly and Charging Rollers
* A Paper Clip on HVT Contacts or Developing Assembly
* Faulty Transfer Roller
* Faulty Static Charge Eliminator
* Defective Composite Power Supply
* Defective DC Controller PCB Assembly
Action
1. Check the values in Service Mode and make sure they correspond to the Service
Label. If the copier receives a spike or surge through the 240V line these values
can change (can also give you blank copies). Take particular note of the Dev Bias
setting. [COPIER > ADJUST > DEVELOP > DE-DC]
2. Make sure the Transport Assembly is engaging properly. The Transfer Roller should
make good contact with the drum. Check condition of screw (XB6-7501-007) and
Pressure Plates (FB5-4816-000 & FB5-4817-000) for the Transport Assembly.
3. Clean HVT contacts for Primary/ Transfer Charging Rollers and Developing
Assembly. Inspect for any paper clips.
4. Replace the Transfer Roller (FF6-0104-000).
5. Replace the Static Charge Eliminator (FF5-7246-000).
6. Replace Composite Power Supply followed by DC Controller PCB Assembly.
Canon PIXMA iP4680

Quality Comes Faster
• 4 x 6” (4R) borderless photo in approx. 20 sec
• Capable of printing borderless photos up to A4 size
Advance Media Handling
• Auto Duplex Printing encourages printing on both sides to save paper
• Two Way Paper Feeding offering you convenience and time savings
• CD/DVD Direct Printing – customize and print your very own CD/DVD labels at home
Memories That Wont Fade
• ChromaLife 100+ technology - photos can last up to 300 years
Connectivity
• PictBridge
• USB 2.0 Hi-Speed
Free Software Sets Your Creativity Free
• Easy-PhotoPrint Ex
• CD Label Print
Environmental Friendly
• Conforms to EU RoHS
• Supports International Energy Star Program
Subscribe to:
Posts (Atom)